Every film photographer we know loves a bit of film stock comparison…at Canadian Film Lab we certainly do!
This is an exciting little project that we thought would help to answer some of the most commonly asked questions of film photographers…What’s the difference between the film stocks? And what difference does changing my exposure make? Our overall objective was to help photographers see the benefit of exposing their images well and avoiding underexposure, and to help give you a feel for the look of the different film stocks.
Those with a passion for the technical detail might first like to skip straight to the bottom of this post before reviewing the images, where you’ll find all of the information about how we exposed, shot, scanned and edited these images, along with our recommendations for getting the very best results from your film. These images were shot in pretty ideal light and the results definitely can’t be generalised across all lighting scenarios but it’s a great place to start! All film was developed normally, with no push or pull processing. The figures you see with the images (-1 Stop, +1 Stop, etc.) refer to stops of underexposure or overexposure achieved ‘in camera’. Full information on the metering technique used is at the bottom of this article.
In each case you can click on the image to see a full size version. We highly recommend viewing these images from around 3 feet / 1 metre away…the (sometimes subtle) differences are more apparent this way.
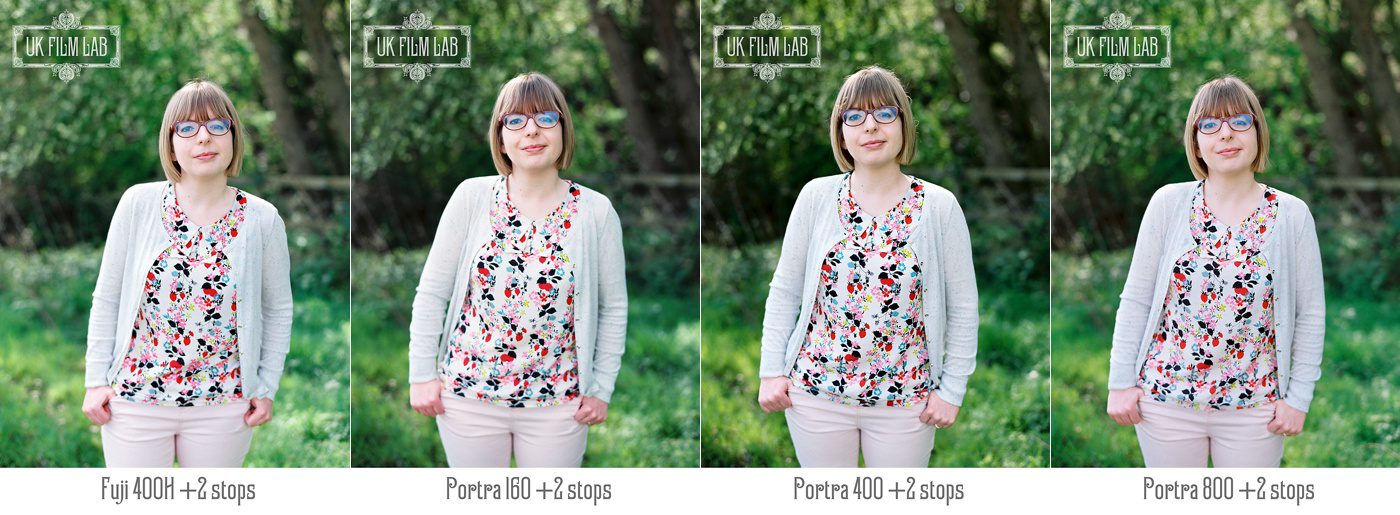
So first up, we’ve selected what we would consider an optimum exposure for this type of light (+2) and shot the following film stocks: Fuji 400H, Portra 160, Portra 400 & Portra 800:
This is a direct side by side comparison of Fuji 400H and Portra 400, the two colour films we most frequently handle at UK Film Lab:

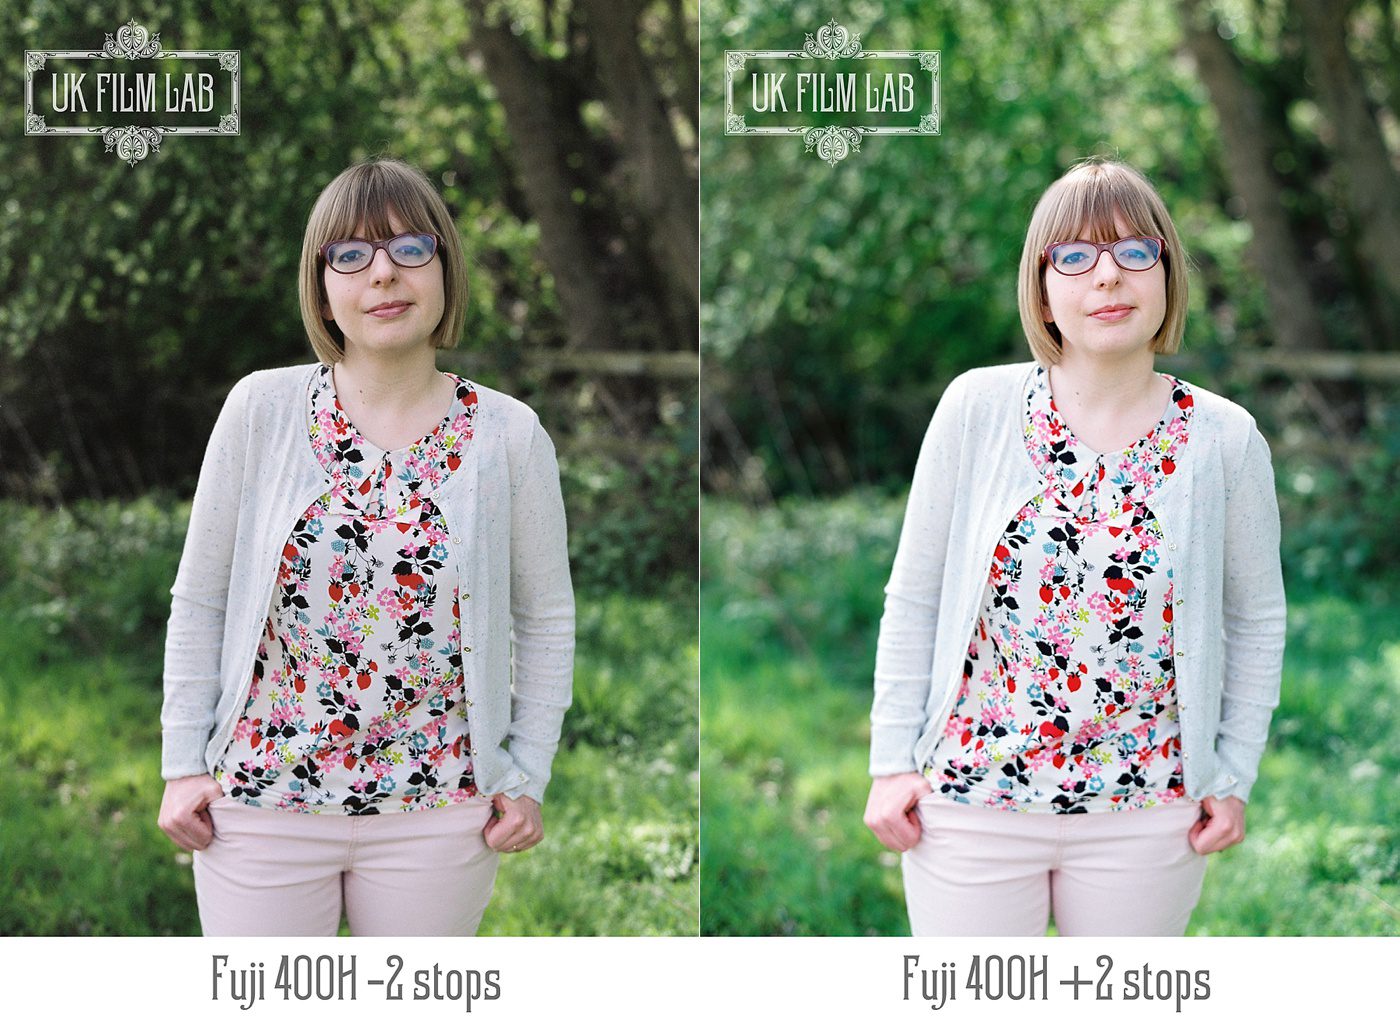
This next shot is a great way to see the hugely important role that good exposure plays in the final look of your images. Here we have Fuji 400H shot at 2 stops under box speed, and 2 stops over box speed:
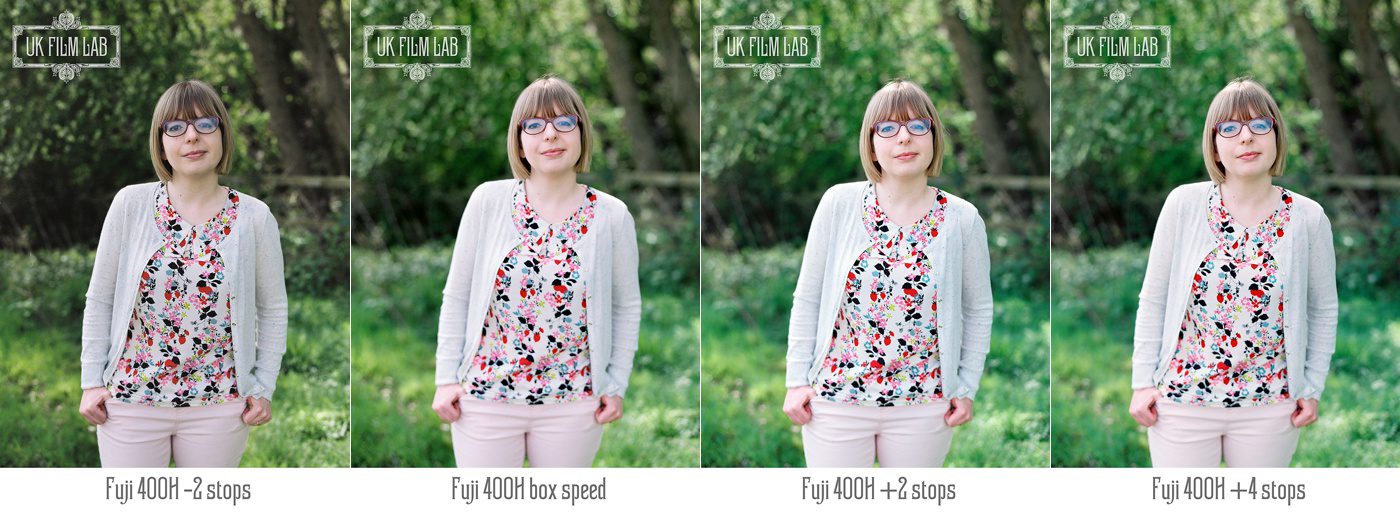
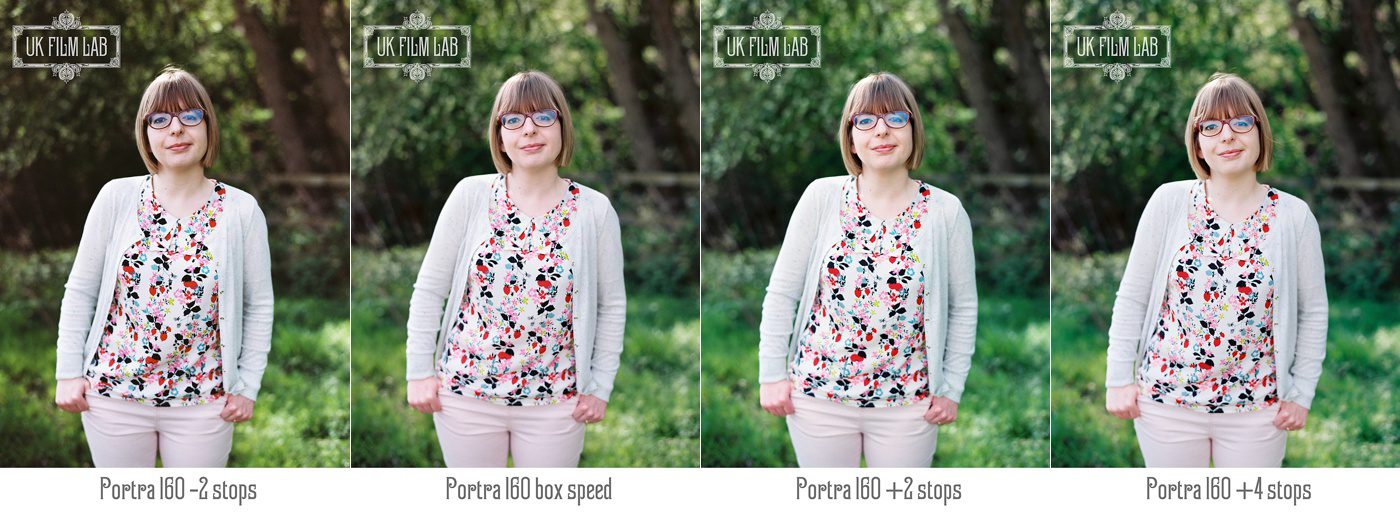
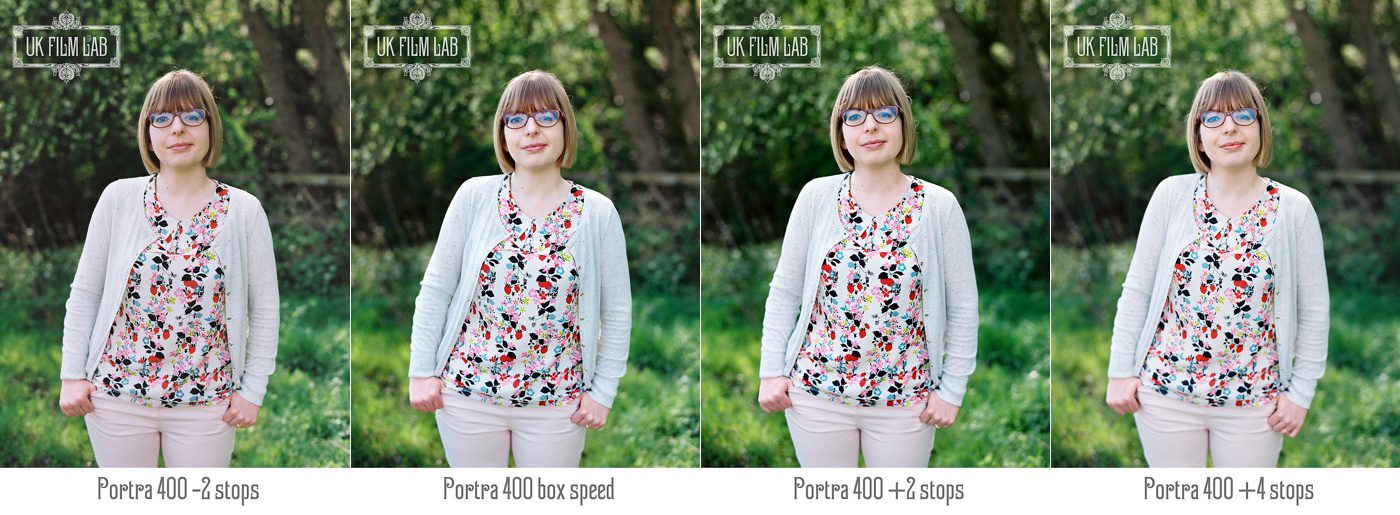
We thought you might also like to see how each of the film stocks in our experiment, react to different exposures. In each case we shot at -2 stops, box speed, +2 stops and +4 stops.

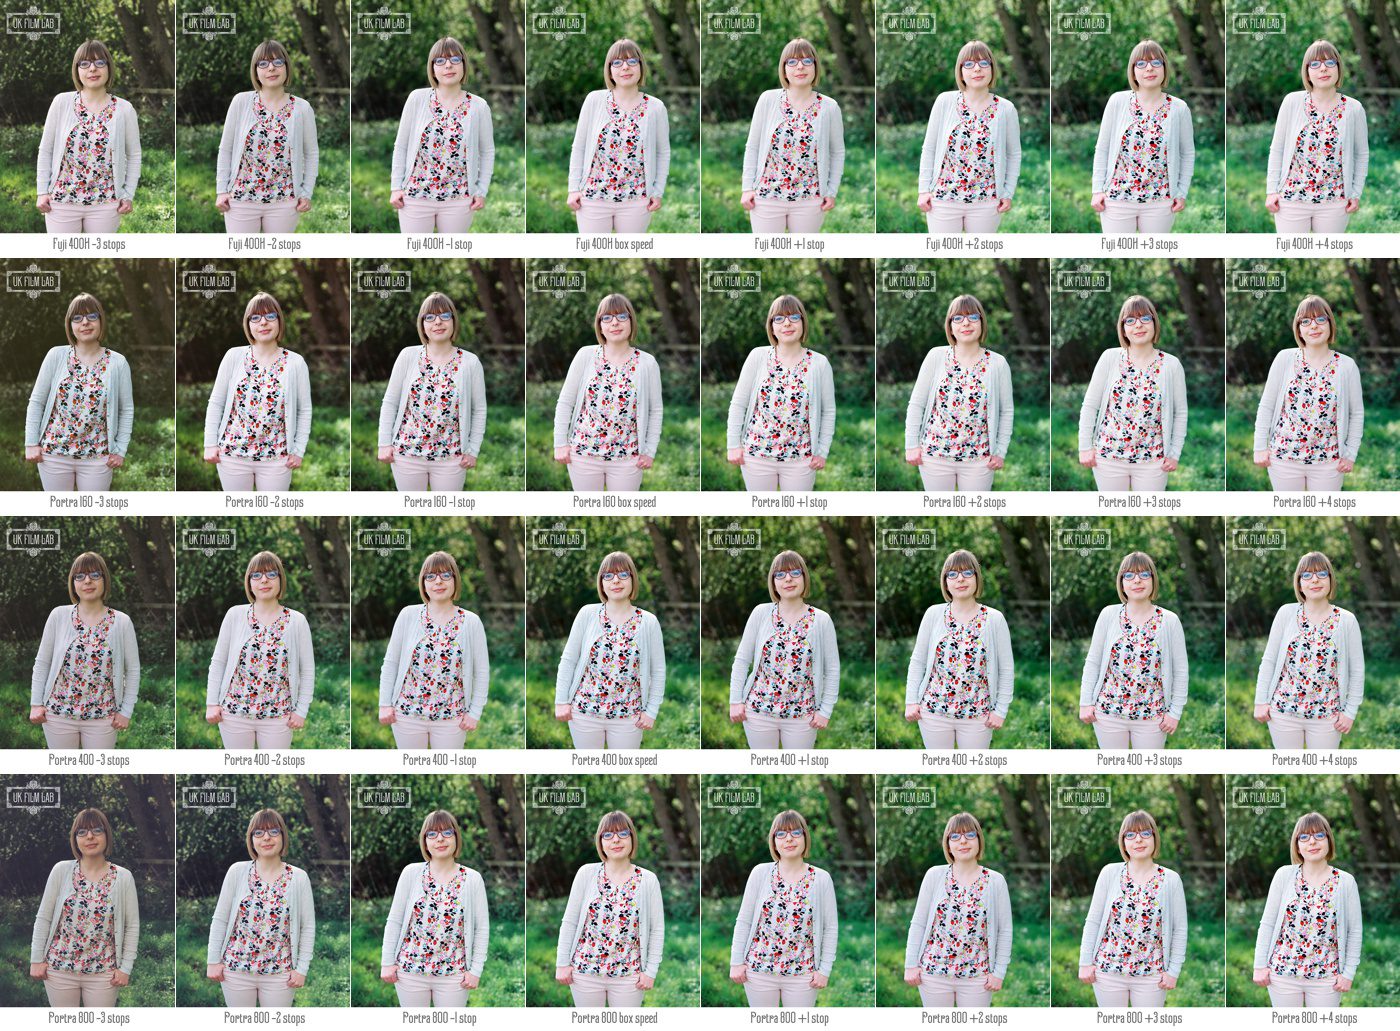
And for the grand finale, ultra film geek experience…we shot a few other exposures too, ranging from 3 under to 4 over, for Fuji 400H, Portra 160, Portra 400 and Portra 800. Even in the large version the very fine detail won’t be visible but we thought it was useful to give you a general feel for the changes at different exposures for each film stock:
So, how did we do it?
We wanted the comparison to be as direct as possible (without getting into full blown controlled experiment territory!) so we shot on a fairly settled weather day and chose a softly shaded area, setting the Contax up on a tripod. Where possible we kept our aperture at 2.8 although for the more underexposed shots we had to narrow this. We spot metered using an external light meter.
We didn’t scan and edit the images to try to match the film stocks to each other…rather we aimed to keep a natural look in keeping with the nature of the light (soft shade naturally gives a reasonably contrasty look, with bright colours in well exposed images) and the film stock. Our main aim was to correct the images as necessary in the scan and edit to create a neutral and pleasing skin tone.
The lowdown on underexposure
As you’ll see, although the stocks all handle different exposure levels differently, across the board at the more significant levels of underexposure it really becomes impossible to create a natural and pleasing look. Other detrimental effects of underexposure include a loss of shadow detail, increased grain and a ‘flatter’ look. These lighting conditions are pretty much ideal, and the detrimental effects of underexposure in less than ideal light would be much worse than this. Another significant disadvantage of underexposing your images is that the results become more variable. Underexposure affects the different colour layers and tonal areas of the film differently and in an unpredictable way, and even within the same scene it becomes impossible to get a consistent ‘look’ across a set of images.
Mixing exposures across your scene will also result in differences in your final image, and so despite the good latitude of film in good light, accurate and consistent metering is still highly desirable in terms of your final results.
The lowdown on overexposure
Additional exposure will create a denser negative. This gives us more ‘information’ to work with in the scanning process at the lab, and allows room for more colour correction if required. Even at 4 stops over no highlight detail was lost in these images but in some cases there was a slight colour and/or contrast shift. At higher exposures (generally +3 and +4) the magenta tone in the highlights increased across the film stocks and required more correction. With this type of light and backdrop this hasn’t posed much of a problem, but in a different scene the need to remove excess magenta could cause unwanted colour shifts that adversely affect the result of your image. And in full direct sun for example, you would definitely risk losing detail at the top end of the exposure range.
In this type of lighting our general recommendation would be for 2 stops of overexposure for optimum results.
These are all excellent quality pro films that when exposed and handled correctly by the photographer and lab, give excellent results. All images were shot by Christian with Erica modelling (yes, I have a very spooky knack for standing and smiling in exactly the same way over 32 shots!) and developed, scanned & edited back at Canadian Film Lab.

[…] http://ukfilmlab.com/2014/04/24/film-stock-and-exposure-comparisons-kodak-portra-and-fuji/ […]
[…] Kodak Portra 400 vs Fuji 400 H […]
[…] shots in the past, I wish I’d realised the benefits of overexposure on film years ago. The exposure feature you did was a real eye opener for me and several photographer friends. All film shooters should […]
[…] through a dark woodland. However, with the desire to avoid underexposure (see our Exposure test here for more information) film shooting in low light presents a […]
This is one of my favorite blog posts. I come back to it when I am trying a new stock. Thanks for making such a nice comparison while keeping other variables consistent.
[…] is very sensitive to correct exposure. Where’s color negative such as Kodak Portra can be significantly overexposed, slide film needs to be shot at the right exposure. No fooling around. I also knew that correcting […]
Very helpful. I was worried about pushing Portra two stops and had heard good things about Fuji 400h for a push. This helps me see the latitude is nearly equal. Thanks for doing the hard work!
Was each test processed identically, i.e. at box speed?
That is correct – no pushing or pulling in development (i.e. normal development).
The best article I’ve ever read about this. Thank you so much! I’m about to become a hybrid shooter and this helped so much.
Thank you very much.
Hello. Was this with 35mm or medium format? Results will be very different with 35mm if this test was done with 120 film.
Hi Richard, these are medium format. There is no difference in latitude between 35mm and 120 film. There is, however, a difference in resolution due to the larger negative, but that doesn’t affect exposure performance.